When you try this and see how easy it is to make DIY bath bombs, you will be amazed. Undeniably, faster than making a trip to Lush and back!
Making DIY bath bombs is a fun little project that’s great to do on your own or as an indoor family activity. The immediate gratitude of watching your efforts fizz away around you in a calming bath is a guaranteed feel-good factor.

DIY Bath Bombs Ingredients
Here are the ingredients and instructions to make plastic free bath bombs:
- 200g bicarbonate of soda (like this)
- 100g citric acid (like this)
- 60g cornflour (like this)
- 4 tbsp of oil, such as melted coconut sunflower or olive oil (like this)
- 1.5 teaspoons of lavender essential oil. You can swap it to another scent as preferred (like this)
- Lavender or other dried flowers, peels or petals to decorate (like this)
Equipment
- mixing bowl (like this)
- weighing scales (like this)
- spoon
- whisk
- silicone or metal moulds (like this) – you can also repurpose yoghurt pots or use ice cube trays
5 step DIY bath bombs
*This blog may contain affiliate links which means I make a small commission if you make a purchase at no additional cost to you. See the disclosure policy for more information.
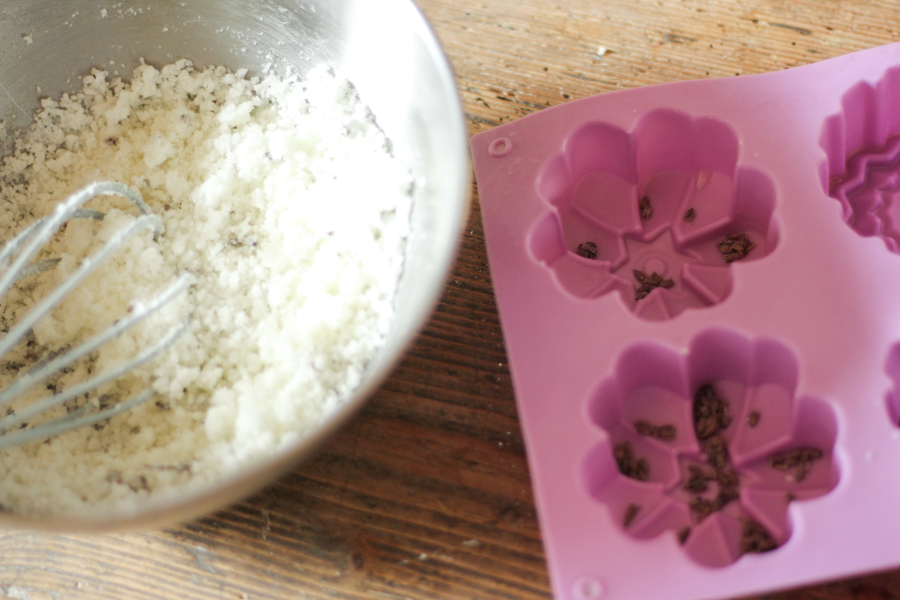
Step 1: Weigh out the ingredients and add the bicarbonate of soda, citric acid and cornflour into a bowl. Then stir all the dry ingredients with a whisk to ensure they’re mixed.
Step 2: Pour the base oil and essential oil into a separate bowl and stir together.
Step 3: Add a small amount of the oil into the large bowl holding all the dry ingredients, and whisk. Then repeat this process whilst very slowly adding small parts of the oil.
Step 4: Now that you’ve added all the oil, you can add a few tiny drops of water and whisk the mixture very quickly again. It will fizz a tiny bit. Place the mixture into your hand and check it ever so slightly clumps together. You don’t want it to be too wet. It should still look crumbly.
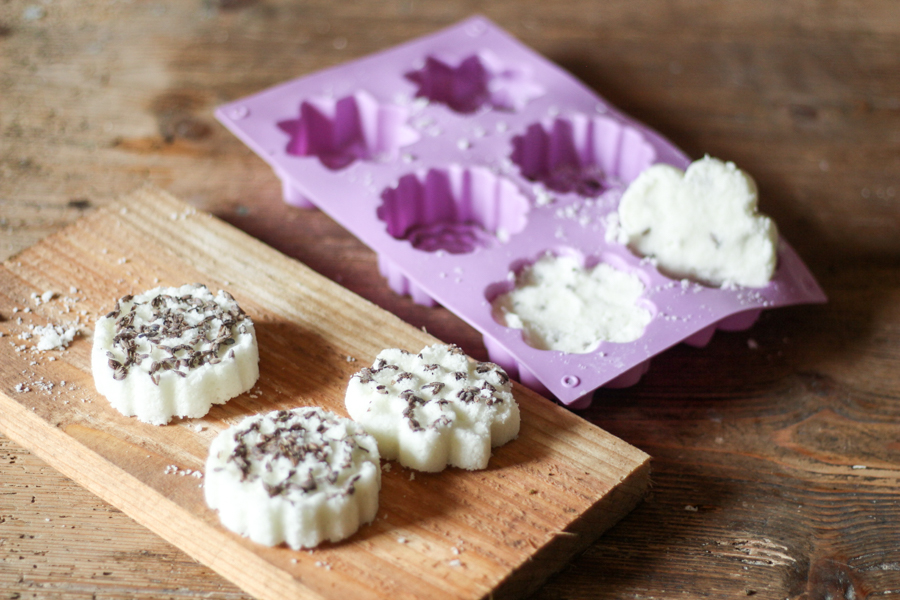
Step 5: Prepare the moulds with a sprinkle of lavender or any other dried decoration in the base. Then begin to spoon in your mixture, you want to ensure that it’s in firmly, so use a teaspoon to press it down. After 2-4 hours, you can remove your DIY bath bombs from the silicone mould. Run a lovely warm bath, pop it in and watch the magical fizz action commence!
Enjoy your DIY bath bombs
DIY bath bombs make beautiful, thoughtful gifts for friends and family.
Enjoy getting creative. I like to add dried lavender to mine, but you can switch it up with other flower petals or dried citrus peels. It’s easy to swap and experiment with smells, liquid food colours and mould shapes.
Have you tried DIY bath bombs before? Leave a comment below and let me know if you’ve had success or if you’re planning to make it and how it goes! If you enjoyed this you may like this post on how to make a cream cleaner.
If you’ve found this blog helpful, you can support me and the site with a cup of tea (I’ll put it in a reusable mug, of course!) or sharing the site with a friend. Your support means the world to me!